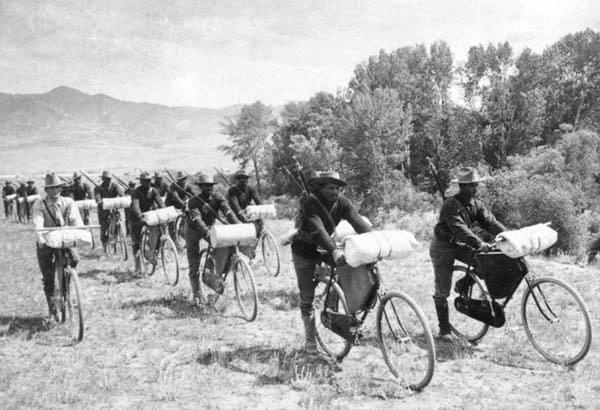
vintage bikepacking
What is Bikepacking and How to Start Bikepacking
I’ve been noticing a new trend, lately, of people taking their bikes into the backcountry. For me, I thought this was an ingenious way of getting further into remote wilderness more quickly, while expending less energy. While I love backpacking and generally being on foot, there are times during hunting season that a bike would make much more sense. So what is bikepacking and how is it different than regular biking? Let’s explore it together.
What is Bikepacking?
Bikepacking is a blend of two words: Biking and Backpacking. It takes the principle of backpacking where one travels to a destination, usually more than one day away, with suitable gear and food in their backpack. Rather than being on foot, bikepacking follows the same principles but distance is covered on a bike and the destination is usually remote wilderness. Similar to backpacking, bikepacking can be a method to find new remote wilderness, or be a really cool way to traverse a country while traveling.
How To Start Bikepacking
While I can go deeper into bikepacking as a means of traveling across countries, I won’t in this article. We’re outdoors people here.
The journey to bikepacking in the backcountry isn’t far off from backpacking. You’ll need your basic gear like having a suitable bike, camping gear, bike repair tools, and a hunger for adventure.
Once you have that, you need to decide where to go. Where can you bikepack? I believe there are two paths: dedicated bikepacking trails and choosing your own adventure.
Google is your best friend to find dedicated bikepacking trails near you. One I’m currently researching is the Oregon Timber Trail, which allows you to bike across Oregon state through 669-miles of trails. The full accomplishment takes 20-30 days, but you can always plan on doing out and back sections based on your own desires.
To choose your own adventure, the two criteria you’ll need for bikepacking are (1) the ability to camp and (2) the ability to take a bike on the trail. Bike trails on public land should solve both of these requirements. My favorite resource for finding trails is All Trails. Start your search by filtering for suitable trails on public land (National Forests, BLM, etc) that are known for biking. Once you filter trails suitable, look for routes that are longer, more remote, but stay within your comfort level.

Bikepacking Setup
A proper bikepacking setup includes a suitable bike, camping gear including emergency kit, and bike repair tools that may be necessary to keep your two wheels spinning. Check out our master camping checklist for a full list of useful gear.
Mountain Bike vs Road Bike
The choice between a mountain bike and a road bike for bikepacking are totally determined by the terrain you’ll be traveling. For me, I want to go into remote wilderness and I’d expect you to want to do the same. However, there are places that are paved and suitable for camping that would still be considered bikepacking.
Bike Luggage and How To Pack a Bike for Bikepacking
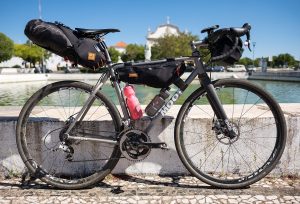
While you could carry everything in a backpack without issue, it is really nice to be able to load up your bike and use it as a tool. Carrying a large backpack can become tiresome. Luckily, there are products specific to bikepacking that make loading up gear much easier. Additionally, where weight is loaded is important. Here’s how to pack a bike for bikepacking:
A bike rack is a very nice thing to have for bikepacking. You can load up larger items on the back of your bike while maintaining usability of the rest of your bike. Additionally, a bike rack is also the prerequisite for putting on bike panniers, or saddle bags, that will add to the capacity of what you’re bringing along. With this set up, you’ll have two bags on the back of your bike as well as a place to put something on top of your rack. I’d recommend tent and sleeping bag with an inflatable sleeping pad on top, with potentially heavier items in the bags.
This waterproof handlebar pack allows you to put things you need dry and easily access to in a compartment within arms reach. Electronics, chargers, cameras, memory cards, and other sensitive materials are all candidates to live on the front of your bike.
A bike frame pack will give you additional space below you. Emergency kits, toiletries, water filtration, bike tools are all candidates here. Putting the heavy stuff in the middle will help keep the weight center.
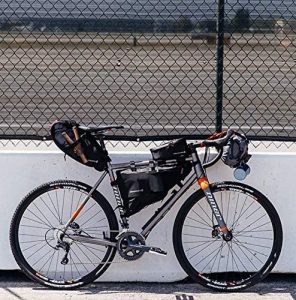
A bike phone case is really nice for navigation. Additionally, that bike phone case also has some storage that I keep some bike tools in, along with mini pump and spare tube.
What Else?
As with any adventure, remember to keep an emergency kit and a means of contact. Remember to tell people when you plan on being back and the general area of where you’re going. Most of all, have fun! Two